All you need to know about Active Directory and programming with Active Directory

Sometimes while discussing technical topics we often come to the Term Active Directory, Domain Controllers, DNS then sometimes we decide to overlook the terminologies and keep concentrating upon what we developers generally do without understanding what they really mean and their importance. Okay , so my ambition is to bridge the gap and give you a bird’s eye view of the active directory structure. Well I don’t literally mean a total bird’s eye view but to carry you inside the Active directory internal structure.
Also I am going to introduce you to the API(Application Programming Interface) through which I am going to communicate to the Active Directory.

So here it goes…. the Basic Understanding of Active Directory concepts and its Programming…

Active Directory and LDAP tutorial, here you will find…..

Please don’t forget to write me back….. I will be waiting 😀

Active Directory and LDAP

Excel VBA Training Tutorial

add-vba-code

Hello everyone, hope you are doing fine. This tutorial is about learning Excel VBA in a short span of time. Recently I got involved in some organizational internal work where I had to do some Automation task using Excel Macro. Also I was being told to tutor what I had learnt. So I personally made this presentation which is full of examples and good to have a start in Excel VBA learning. So here goes the link below.

ExcelVBA_Macros_TrainingTutorial

Please email or send me your feedback about the same and I will be more than happy.

Create Wix xml Magic Template is Ready

Hello Everyone, this is Sunayan from TechHelpGo and as I promised the template for Creating Wix xml is ready for action. Let me help you with some of the snapshots of the Wizard that I have created.

CreateWixMagicWizard_01

Here as you can see the Wizard takes input of the Solution File in which you want to add your Wix Setup Project. After adding the project only the Wizard will become visible to you. After that you can select either building the whole solution in the Build Path that you have provided in the search box or certain projects only. You have been provided with the option in form of radio buttons to select your preference. There are two Checked List Box provided in which on the left you will get all the projects inside the solution and in the right Checked List Box you will get the Web Projects that can be published to the build path that you have provided in the wizard.

  1. So Firstly you need to add your Add a new project inside your solution.

CreateWixMagicWizard_00

2. Then you have to select the project template that actually contains the Magic Wizard for creating the XML. Click on OK to continue.

CreateWixMagicWizard_00A

3. Then the Custom Wizard will appear to take required inputs from your end.

CreateWixMagicWizard_00B

4. Then you need to select the solution file(.sln) in order to enlist all the projects inside solution as well as the Web Projects that will be visible in the Checked List Box on the Right side.

So provide your inputs as required such as the screenshot below.

CreateWixMagicWizard_00C

5. Click on Build or Publish button as per your requirement and it will build one by one the projects into the Build Path in the Release mode.

6.  Provide the Install location by selecting a valid install location.

7. After that Click on Generate Wix Wxs button to generate the XML for you. Screenshot for your reference.

CreateWixMagicWizard_02

8. Click on “OK” after it creates the XML.

9. Now you can see the xml that is ready to build.

CreateWixMagicWizard_03

Now you can Build the Wix Setup Project and the Installer will be ready for you. You might want to change some parameters such as “Pruduct Name“, “Manufacturer“, “Feature Title” as suitable. Also the name of the OutPut MSI as required.

CreateWixMagicWizard_04

Now Build the Project and you are ready to go…………

Now there are some prerequisites that I need to mention. This template internally uses Heat.exe(C:\Program Files (x86)\WiX Toolset v3.10\bin\heat.exe) to generate the XML. Also it is built upon WIX version v3.10. Otherwise it will show exception while generating the xml.

you can download the VSIX installer from here.

Please let me know if you find any difficulty in operating the Wizard. Also waiting for your valuable feedbacks.


Wix Creation Magic tool…coming soon

Recently I was working on an idea to work upon or create a Wix Project Template that can be added in any solution which will come with a wizard which will take all the mandatory inputs as parameters and generate the Wix XML by itself. It will also do the task of building and publishing the projects inside the solution. The Directory Structure will be created by itself.

So watch out …I will soon publish a video tutorial of how to use that Project Template and a link to the .vsix installer.

Coming-Soon

Publishing Web Application Projects

Recently I was working in a value addition where there was a requirement of publishing WebApplication. I initially tried with searching of some form of aspnet_compiler API and found something like below.
————————————————————————————
string msPath = @”C:\Windows\Microsoft.NET\Framework\v4.0.30319″;
string msCompiler = “aspnet_compiler.exe”;
string fullCompilerPath = Path.Combine(msPath, msCompiler);

ProcessStartInfo process = new ProcessStartInfo
{
CreateNoWindow = false,
UseShellExecute = false,
RedirectStandardOutput = true,
WorkingDirectory = msPath,
FileName = fullCompilerPath,
Arguments = string.Format(“-p {0} -v /{1} -f {2}”, “\”” + solutionFileDirectory + strProjectPath + “\””, “/Web”, “\”” + txtBuildPath.Text + “\””)
};
Process p = Process.Start(process);
string output = p.StandardOutput.ReadToEnd();
——————————————————————————–
But there is  requirement of adding modification of the output after aspnet_compiler is done with such as adding global.asax, deleting unwanted folders etc.So you need to add custom code to make those modification.
It is really a mundane task and also the output is also not perfect.

Recently I have found out a way to publish web application by writing some custom code of my own and then creating an exe out of a console application. You can create this by simply creating a console application and copy paste the entire code in the main method. BTW below namespaces are used to create this app. Also you need to add the below references.

Microsoft.Build.Engine
Microsoft.Build.Framework
using Microsoft.Build.BuildEngine;
using System.IO;
————-CODE TO BE PUT INSIDE MAIN METHOD—————

try
{
string solutionFilePath = args[0];
string strBuildPath = args[1];
if (Directory.Exists(strBuildPath))
{
string[] filePaths = Directory.GetFiles(strBuildPath);
string[] folderPaths = Directory.GetDirectories(strBuildPath);
foreach (string filePath in filePaths)
{
File.Delete(filePath);
}
foreach (string folderPath in folderPaths)
{
Directory.Delete(folderPath, true);
}
}
else
{
Console.WriteLine(“Please enter Valid publish and build path”);
}
Engine objEngine = new Engine();
objEngine.BinPath = @”C:\Windows\Microsoft.NET\Framework\v4.0.30319″;
FileLogger logger = new FileLogger();
logger.Parameters = @”logfile=C:\temp\build.log”;
objEngine.RegisterLogger(logger);
BuildPropertyGroup objBuildPropertyGroup = new BuildPropertyGroup();
objBuildPropertyGroup.SetProperty(“Configuration”, “Release”);
objBuildPropertyGroup.SetProperty(“OutputPath”, strBuildPath);
bool success = objEngine.BuildProjectFile(solutionFilePath, new string[] { “Rebuild” }, objBuildPropertyGroup);
try
{
string[] pathDir = solutionFilePath.Split(‘\\’);
string folderName = pathDir[pathDir.Length – 1].Replace(“csproj”, “”);
string strPublishPath = Path.Combine(strBuildPath, “_PublishedWebsites”, folderName);
string[] filePaths = Directory.GetFiles(strBuildPath);
string[] publishedFilePaths = Directory.GetFiles(strPublishPath);
string[] publishedFolderPaths = Directory.GetDirectories(strPublishPath);
foreach (string filePath in filePaths)
{
File.Delete(filePath);
}
foreach (string fPath in publishedFilePaths)
{
File.Move(fPath, Path.Combine(strBuildPath, Path.GetFileName(fPath)));
}
foreach (string dirPath in publishedFolderPaths)
{
Directory.Move(dirPath, Path.Combine(strBuildPath, new DirectoryInfo(dirPath).Name));
}
Directory.Delete(Path.Combine(strBuildPath, “_PublishedWebsites”), true);
}
catch(Exception ex)
{
Console.WriteLine(ex.Message);
success = false;
}
if (success)
{
Console.WriteLine(“Publishing Completed Successfully”);
}
else
{
Console.WriteLine(“Publishing Failed”);
}
}
catch (Exception ex)
{
Console.WriteLine(ex.Message);
}

————————————————————

MOSS 2007 TO SHAREPOINT 2013 MIGRATION in TEST ENVIRONMENT

When the opportunity knocks to Migrate from existing MOSS (Microsoft Office SharePoint Server) 2007 Portals to SharePoint 2013 where the architecture has been turned to completely different comparing several features and elements that has been introduced, deciding the approach isn’t so easy when you have lots of customization in place. Also when there is a completely new concept of App Model is introduced where the code doesn’t necessarily lies on the server side to handle execution, deciding the approach is a really brainstorming exercise.

We all know that to implement customization we heavily depend upon Custom SharePoint features and solutions based upon our unique requirement of implementing business logic. Also from Migration perspective what change we need to consider is the approach that is involved to migrate the Class Library based SharePoint 2007 solutions to Visual Studio template based SharePoint 2013 solutions. In addition to this also what we need to decide is whether we really need to migrate from Server Side Object Model to the newly introduced App Model feature of SharePoint 2013. So this is from development perspective where a lot is required to be decided to finalize the approach. But there is lot to be implemented when we need to setup SharePoint 2013 in DEV, TEST and PROD environment. I mean to say there is lot to consider in Administration perspective as well when you migrate from MOSS 2007 to SharePoint 2013.

In this section we are specifically going to focus upon the term “AS IS MIGRATION” that means we are not going to introduce APP Model, we are just migrating whole content from SharePoint 2007 to 2013 keeping both the look and feel and functionality intact. Also we are not going to introduce any third party tools that will help us migrate the content directly from MOSS 2007 environment to SharePoint 2013 environment. Here we will introduce an interim SharePoint 2010 environment and use Database Attach method for the migration procedure.

So let’s go ahead and get started.

  • Migration Strategy
  • Migration using Database Attach Method

When we are not going for Tool based migration in our SharePoint 2013 Migration approach, there is not much way left to migrate from MOSS 2007 except the Database attach method. So we are taking this database attach methodology to proceed but in this scenario there is requirement of Interim SharePoint 2010 environment where we need to make our first leap and then move it to SharePoint 2013. Below diagrams demonstrate how we are going to move forward in this case.

SharePoint 2013 Migration Upgrade path

SharePoint 2013 Migration Upgrade Path Image2

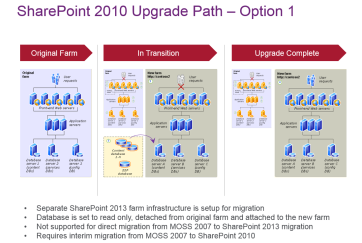
So in this scenario we are taking the below points into consideration.

  • Separate SharePoint 2013 farm infrastructure is to setup for migration
  • Database is set to read only while migrating from SharePoint 2007 to 2013.
  • Requires interim migration from MOSS 2007 to SharePoint 2010 however it doesn’t require full setup of the farm such as configuring WFE, Application and Database server, minimal infrastructure to configure SharePoint 2010 environment is enough (Minimal infrastructure indicates having separate SharePoint and DB server, you may not go for installation in a single server as it might cause issues in future.). We will simply use this to transfer the database in between.
  • Migrating the customizing code that has been used is one important perspective. In this case the migrated assemblies and their versions must match with the existing Assemblies and their versions otherwise it will end in showing up errors in page.

So in this article we will try to cover as much as we can from SharePoint Administration and as well as Development Perspective.

INSTALLATION AND CONFIGURATION OF SHAREPOINT 2010 ENVIRONMENT

I believe the existing MOSS 2007 environment is already there so what we need to do in the first place is to set up the Interim SharePoint 2010 environment which can be found in so many articles/ blog posts over the net. One of the blog that I found is here.

http://sharepoint-community.net/profiles/blogs/step-by-step-installation-of-sharepoint-2010-on-windows-server-1

Although you might not need to create so many service accounts as its sole purpose is to use it for Database Migration. Still I will suggest there should be one account (preferably domain admin) solely created for this installation and configuration purpose.

I will also suggest to download the SharePoint prerequisites installers separately (if you are planning to install it in an internet free environment) and keep it in the server in a separate location.

While installing the pre-requisites there is no particular sequence to be maintained for SharePoint 2010 but we will see later on this tutorial that for SharePoint 2013 there is a particular sequence to be maintained and followed failing which the whole server is required to be formatted and recreated for the installation purpose.

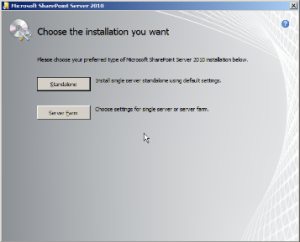
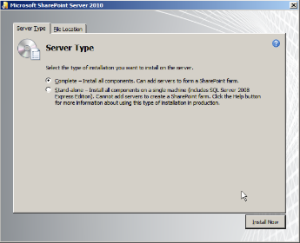
Anyways While installing SharePoint 2010, select “Server Farm” option as we are not going to configure a standalone environment. Also select “Complete” as server type

sharepoint 2010 installation complete sharepoint 2010 installation complete2

After the installation later on this article we will decide to setup our SharePoint 2013 farm which will actually host our migrated Web Applications.

Taking the Content Database Backup of MOSS 2007 websites

Set the databases to read-only before taking backups.
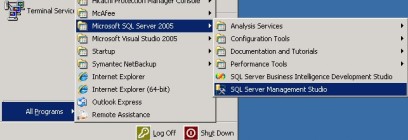
•             On the MOSS 2007’s database server, click Start, point to All Programs, Microsoft SQL Server, and then click SQL Server Management Studio.

SharePoint 2013 Migration Content Database BackUp

  • Traverse to Databases node by expanding the tree
    • Right-click the name of the database that you want to set to read-only, and then click Properties.
    •             In the Properties dialog box, click the Options tab.
    •             Under State, select the Database Read-only to True, and then click OK

Backup the database:
Follow these steps to take back-up:
•             Traverse to Databases node by expanding the tree.
•             Right-click the database you want to back up, point to Tasks, and then click Backup Database

  • In the SQL Server Backup dialog box, specify a name for the backup, select Back-up type – Full, select a destination, and then Click OK to start the backup process.

Content Database BackUp2

Restore the Backup on SharePoint 2010 SQL server
•             Open the SQL Server Management studio, traverse to “Databases” node. Then right click the “Databases” node and choose “Restore Database…” from the context menu.

Content Database Restore

Specify the Database name, Restore Source, Destination, File names in the screens.
•             Click “OK” to start the restore operation and Wait for the restore to complete! The time of restoring database depends upon the database size and server’s capacity.
•             Make the Read-Only database to false after restore

Remove content database of the newly created web application in SharePoint 2010

Remove content database of the newly created web application in SharePoint 2010
Now, we need to delete the content db of the newly created web application in order to avoid any URL conflicts. Run the below stsadm command:
stsadm -o deletecontentdb -url <http://url&gt; -databasename <MOSS2007_Migration_Content>
Attach restored database with the newly created web application in SharePoint 2010
•             Test the content database: Before attaching the content databases to the Web applications, use the Test-SPContentDatabase PowerShell cmdlet to verify that all of the custom components that you need for that database. It checks for all artifacts such as feature, setup files, web parts etc. that are referred in the content database are installed in the farm and provide you with a report.
•             Test-SPContentDatabase -Name <DatabaseName> -WebApplication <URL>
•             Delete the corrupted objects
•             stsadm -o databaserepair -url <URL of SharePoint site> -databasename <name of database> -deletecorruption
•             Attach the Content DB to Webapplication
•             Finally, we need to attach the restored MOSS 2007 database to SharePoint 2010 by running the STSADM command
The Content DB containing the root site collection is always applied first.
The other content DBs can be applied in any order. Attach the Content DB of the Root Site collection First. And then Attach the Content DBs of other Site Collections.
stsadm.exe -o addcontentdb -url <URL of SharePoint site> -databasename <MOSS2007_Portal_Content>

  • Or you can use the PowerShell cmd-let: Mount-SPContentDatabase
    Mount-SPContentDatabase -Name <DatabaseName> – databaseServer <ServerName> -WebApplicationURL

Create Service Account in the domain in order to adhere to Medium Security Option (Sweet Spot). Please refer to the below link for more details. In this case we are hereby creating the below service accounts.

http://absolute-sharepoint.com/2013/01/sharepoint-2013-service-accounts-best-practices-explained.html

For the SQL Server

  • SQL_Admin
  • SQL_Services

For the SharePoint Server

  • SP_Farm
  • SP_Admin
  • SP_Pool
  • SP_Services
  • SP_Crawl
  • SP_Search
  • SP_UserProfiles

If we need to install visual studio Office Developer Tools for Visual Studio 2012 which in Development Environment we can follow the below steps.

1) Download Microsoft Office Developer Tools for Visual Studio 2012

follow this link

http://aka.ms/OfficeDevToolsForVS2012

2) Once it’s downloaded, open PowerShell and run the following command:

WebpiCmd.exe /offline /products:OfficeToolsForVS2012RTW /Path:C:\Temp\OfficeToolsForVS2012RTW

3) So what we will do is download the WebPi binaries from here:

http://download.microsoft.com/download/7/0/4/704CEB4C-9F42-4962-A2B0-5C84B0682C7A/WebPlatformInstaller_amd64_en-US.msi

Copy the msi from download location to C:\Temp\OfficeToolsForVS2012RTW

4) Copy the entire Directory

C:\Temp\OfficeToolsForVS2012RTW to some Location in D:\Softwares\OfficeToolsForVS2012RTW

5) Run the Below Command

D:\Softwares\OfficeToolsForVS2012RTW\WebPlatformInstaller_amd64_en-US.msi /q

Start-Sleep -s 120

D:\Softwares\OfficeToolsForVS2012RTW\bin\WebpiCmd.exe /install /products:OfficeToolsForVS2012RTW /XML:D:\Softwares\OfficeToolsForVS2012RTW\feeds\latest\webproductlist.xml /AcceptEula

INSTALLING AND CONFIGURING SHAREPOINT 2013

Whenever it comes to install SharePoint 2013 or Configuring SharePoint 2013 farm we need to install pre-requisites manually in a particular sequence in order to prperly configure SharePoint 2013. Also this installation procedure requires the prerequisites to be installed in each SharePoint Servers before we can actually continue with our actual SharePoint 2013 installation.

There is good blog post I find here in the internet  about installation of the pre-requisites and their sequence. Here it is

http://blogs.technet.com/b/meamcs/archive/2012/12/26/install-and-download-sharepoint-2013-prerequisites-offline-manually.aspx

Anyways I am stating the prerequisites that are required. One thing I need to specify over here that it is very important – the installation of AppFabric in the server. If it is not installed in this sequence and there is an error in installing Appfabric later, then nothing can be done. You will end up in formatting the whole system to start for a fresh installation of SharePoint.

Other installations are pretty simple only the installation of Appfabric is not straightforward. To install it you need to run command prompt and run it as Administrator and then type the following command to trigger prerequisiteinstaller.exe to run Appfabric which is downloaded at the below location. After running this command the pre-requisite installer will fire up and then it will install Appfabric.

  • Microsoft .NET Framework 4.5
  • Windows Management Framework 3.0
  • Microsoft SQL Server 2008 R2 SP1 Native Client
  • Windows Identity Foundation (KB974405)
  • Windows Identity Extensions
  • Microsoft Sync Framework Runtime v1.0 SP1 (x64)
  • Microsoft Information Protection and Control Client
  • Microsoft WCF Data Services 5.0
  • Windows Server AppFabric

install appfabric

  • Cumulative Update Package 1 for Microsoft AppFabric 1.1 for Windows Server (KB2671763)

Later on this stage the installation is quite straight forward for SharePoint 2013 only on the configuration peospective you have to select “Complete” as we are going to add more servers into the farm. In this scenario we will have two SharePoint Front End web servers, Two Application servers and one database cluster which will have one Alias(CNAME) of DB001.DOMAIN.COM.

The network architecture will look something like this while having two Front end, two Application and one database cluster in place. The Front end servers will be in a different subnet than the Application servers and the database cluster will be in a different subnet than the Application servers. Please follow the following steps in order to install and configure SharePoint 2013.

  • Download and distribute SharePoint 2013 prerequisites in the SharePoint servers and keep it in a fixed location.
  • Copy the SharePoint 2013 installer with its key in each of the servers(except the DB server).
  • Install the pre-requisites in the server keeping the order same as mentioned before.
  • Install SharePoint 2013 after installation of SharePoint prerequisites are done. While installation select “Complete” and specify the Configuration Database server as DOMAIN.COM. Configure Central Administration in one of the Application server and later on while configuring add other SharePoint servers as well using the Passphrase that you have mentioned earlier.

Below steps we need to configure for to setup service account as farm administrator

Add SERVICE Account as Farm Administrator

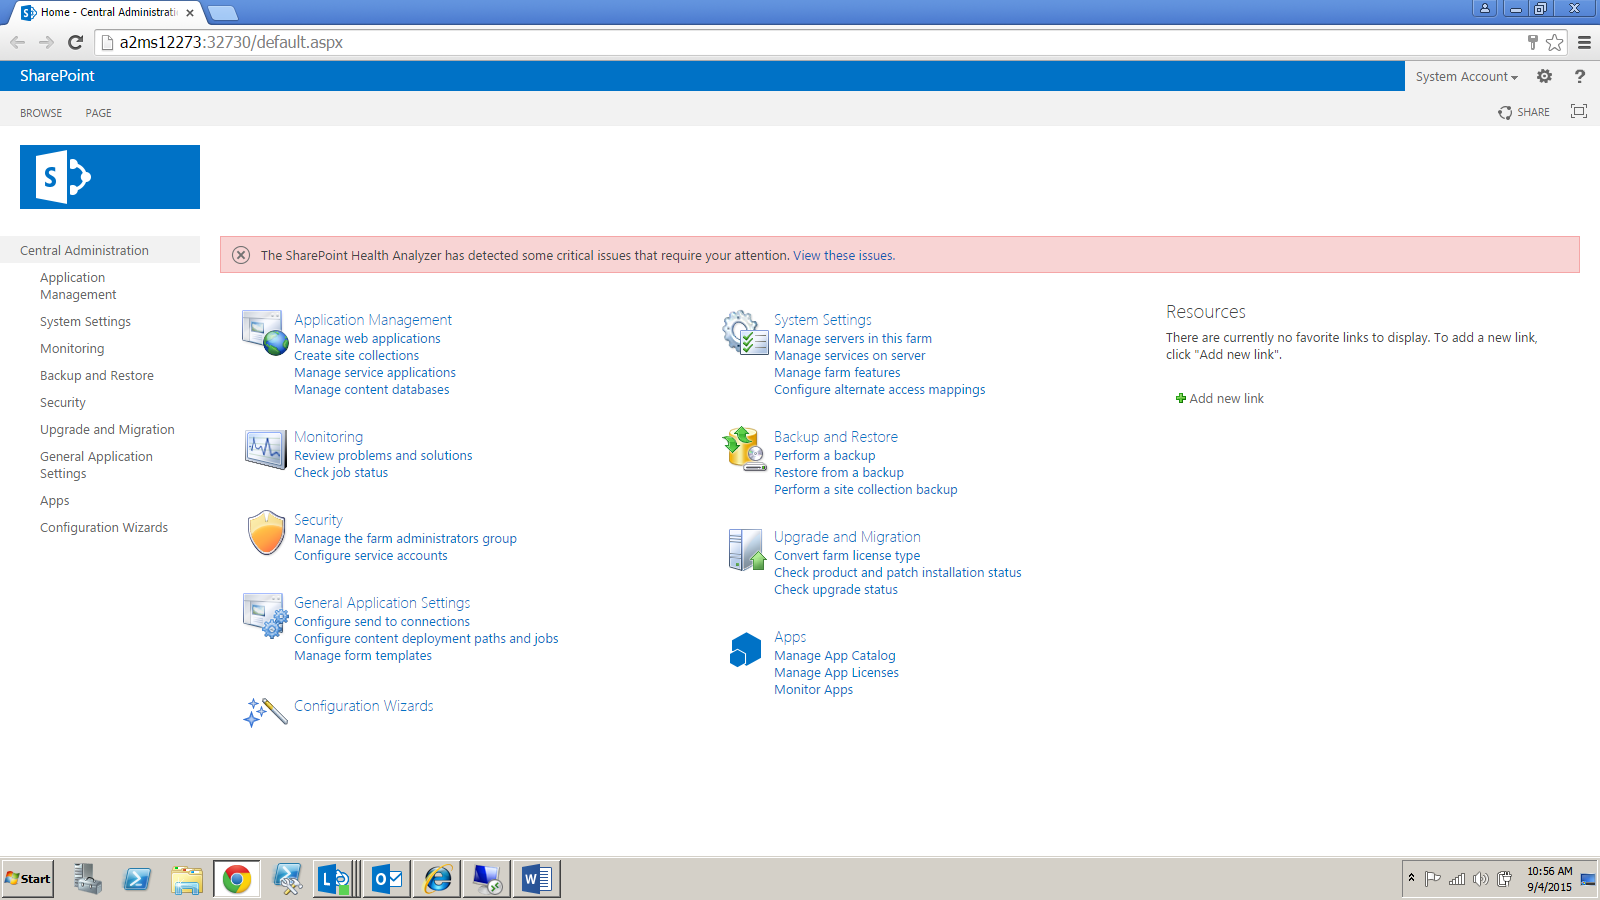
Make sure that account “domain\farmadmin001” is added inside Farm Administrator Group in Central Administration if it is not there. Go to Central Administration–>Security–>Manage the Farm Administrator Group

Add Service Account as Farm Administrator

Add Service Account as Farm Administrator 2

Configure Manage Accounts

From The Central Administration go to Security –> “Configure managed Accounts” under “General Security” Click on Register Managed Accounts and Set up the accounts as follows:

Register Managed Accounts 2

SharePoint

SharePoint version number: 15.0.4569.XXXX. This is available from the central admin. This number is important when backing up and restoring sites as you cannot restore on to a server where the version number is lower than the one from where the backup was taken. Also this number gives you information on the installed service packs.

Services running on the server:

  • Business Data Connectivity Service
  • Managed Metadata Web Service
  • SharePoint Server Search
  • State Service
  • Secure Store Service
  • Usage and Health Data Collection Service
  • User Profile Synchronization Service
  • Word Automation Services
  • .net Session State Service

Database

  • Server: DB001.DOMAIN.COM
  • Configuration database: SharePoint_2013_Config

Configure Service Applications

For Service applications we will need to run one PowerShell script to automate the Service Application Creation. Along with that we will configure Search Topology and other required solution preparation environment.

Edit the following PowerShell script ConfiguringServiceApplicationsScript.ps1.

We need to pass the below parameters inside of the PowerShell Script as follows.

Creating Service Applications

Now run the PowerShell Script by Opening Windows PowerShell ISE as Administrator. Opening the Script and hit “F5”

The process should successfully complete. Message should appear as “”Search Configuration Done Successfully”

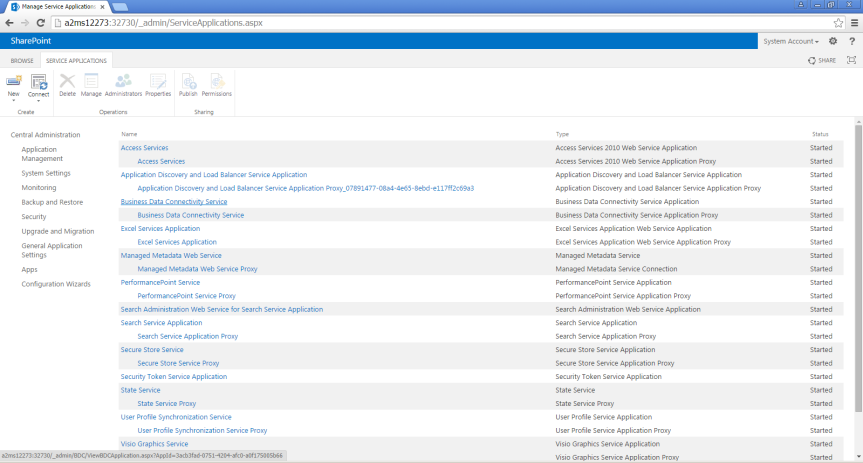
Go to Central Administration > Application Management > Manage Service Applications

The Screen should now be visible with all the Service Applications along with their Proxies in a list.

Service Applications Screenshot

Now we will do configuring Search Topology using the below powershell script

CONFIGURING SEARCH TOPOLOGY

Configuring Search Service Application

Creating a Web application for the site

Create a new web application following the steps below for the portal:

If the SharePoint Central Administration website isn’t already open, select Start > All Programs > SharePoint Central Administration. Run SharePoint Central Administration as Administrator.

  • Click on the Application Management link in Central Administration web site.
  • Click on the Manage Web Applications link then click on New link in the ribbon menu to create new Web application
  • On the Create New Web Application page, enter the following required information, including the port number  and then click OK button.

Deploying Custom and Third Party Solutions

Open “SharePoint 2013 Management Shell” by clicking the same link at Start menu and Run the program as Administrator.

opening sharepoint 2013 management shell opening sharepoint 2013 management shell2

Add-SPSolution -LiteralPath <SolutionPath>

After adding the solutions those can be visible in the Solution Store inside Central Administration. Go to SharePoint 2013 Central Administration àSystem Settings àManage Farm Solutions. The Solutions are now visible in the list.

Deploy the solution by running the below line of commands

Next is to deploy the solutions by running the following command or it can be deployed using Central Administration.

  • Install-SPSolution –Identity solution.wsp –WebApplication http://webApp:1234/ –GACDeployment:$true -force:$true
  • IISReset

To deploy a solution from Central Administration you simply need to click on the link of the Solution and in the page Click Deploy Solution.

Create a Site Collection in both Web Applications

Run the following command in PowerShell along with the below parameters

$farmaccount = “domain\farmacc001”

$contentdb = “WSS_ContentDB_2013”

New-SPSite http://WebApp:1234/ -owneralias $farmaccount -name “Sample Web Application” -language 1033 -Template “STS#0” -ContentDatabase $contentdb -ErrorVariable err

If Site Collection gets created successfully then restore the backup from DEV environment to Test

The STSADM.exe is located at the below location:

“C:\Program Files\Common Files\Microsoft Shared\Web Server Extensions\15\BIN”

  • STSADM –o restore –url http://WebApp:1234/  -filename  [Backupfilename]   -overwrite
  • Insert an entry inside the PageParserPath element of Web.Config file to allow server side code
  • IISReset
  • Insert an entry inside the Safe Control Section of web.config

Enable ASP.net Session State Service

Enable SPSession State Service by running the following command in SharePoint 2013 Management Shell.

Enable-SPSessionStateService -DefaultProvision

Copy the Javascript files found in the Javascript folder to the below location

“C:\Program Files\Common Files\Microsoft Shared\Web Server Extensions\15\template\layouts\1033”

Configure the Alternate Access Mappings

From the central admin, open the operations tab and select “Alternate Access Mappings”.

Disable Loopback check

Run Windows PowerShell as Administrator and type the following command to disable Loopback Check. Please open your site in internet explorer to test if the Site is opening in the browser.

New-ItemProperty HKLM:\System\CurrentControlSet\Control\Lsa -Name “DisableLoopbackCheck” -Value “1” -PropertyType dword

Wix Project Creation and Automation in a single Video tutorial

Remember when you are given the task to create a wix project to create msi package and you are tired of writing the xml manually. So here is a good news. This tutorial will guide you to automate the whole process and generate the xml (.wxs) .

Please visit the below link for the complete video tutorial.

Configuring SharePoint Custom Webparts and User Controls

Hi everyone, This is Sunayan from TechHelpGo and I am here to discuss SharePoint Webpart and User Control deployment. Whenever it comes to Developing SharePoint Webpart/User Control the question comes to mind about its deployment also.There can be two ways of Sharepoint Webpart deployment. One through SharePoint Feature and Solution and another way we can achieve through dropping it into the bin directory of the web application and recyling the application pool. The better way to deploy SharePoint User Control is to wrap it inside a Webpart and deploy it.
Here is the code reference.

Here I am Loading an User Control named “AddMember.ascx” and loading it in the page by overriding the CreateChildControls method.

private string path = “~/UserControls/”;
private string file = “AddMember.ascx”;

protected override void CreateChildControls()
{
try
{
Control ctrl = Page.LoadControl(path+file);
((AddMember)ctrl).WebPart = this;
Controls.Add(ctrl);
}
catch (Exception ex)
{
Label lbl = new Label();
lbl.Text = ex.Message;
Controls.Add(lbl);
}
finally
{
base.CreateChildControls();
}
}

private string memberListName = “MembersAndStakeHolders”;
[WebBrowsable(true), Personalizable(true)]
[Category(“Member list name”)]
[Description(“Member list name”)]
[FriendlyName(“Member list name”)]
public string MemberListName
{
get { return memberListName; }
set { memberListName = value; }
}

———————————————————————————————————-

Here Goes the implementation of a sample User Control and it’s inside business logic.

namespace CTS.IME.PMO.CU.UserControls
{
public partial class FilterAssociates : System.Web.UI.UserControl
{
protected void Page_Load(object sender, EventArgs e)
{
rdVertical.Checked = true;
rdBoth.Checked = false;
if (!IsPostBack)
{
DataTable dtVertical = GetAssociateData(true);
if ((dtVertical != null) && (dtVertical.Rows.Count > 0))
{
grvVertical.DataSource = dtVertical;
grvVertical.DataBind();
}
DataTable dtBoth = GetAssociateData(false);
if ((dtBoth != null) && (dtBoth.Rows.Count > 0))
{
grvBoth.DataSource = dtBoth;
grvBoth.DataBind();
}
}
}

private DataTable GetAssociateData(bool isVertical)
{
List<Member> lstVerticalMembers = new List<Member>();
List<Member> lstBothMembers = new List<Member>();

DataTable dtMain = new DataTable();

DataTable dtVertical = new DataTable();
DataTable dtBoth = new DataTable();

DataView dvBillable = null;
DataView dvNonBillable = null;
DataView dvPA_Above = null;

DataColumn dtType = new DataColumn();
dtType.DataType = Type.GetType(“System.String”);
dtType.ColumnName = “TYPE”;
dtMain.Columns.Add(dtType);

DataColumn dtOnsite = new DataColumn();
dtOnsite.DataType = Type.GetType(“System.Int32”);
dtOnsite.ColumnName = “ONSITE”;
dtMain.Columns.Add(dtOnsite);

DataColumn dtOffshore = new DataColumn();
dtOffshore.DataType = Type.GetType(“System.Int32”);
dtOffshore.ColumnName = “OFFSHORE”;
dtMain.Columns.Add(dtOffshore);

DataColumn dtTotal = new DataColumn();
dtTotal.DataType = Type.GetType(“System.Int32”);
dtTotal.ColumnName = “TOTAL”;
dtMain.Columns.Add(dtTotal);
SPSite site = SPContext.Current.Site;
SPWeb web = SPContext.Current.Web;

SPSecurity.RunWithElevatedPrivileges(delegate()
{
using (SPSite objSite = new SPSite(site.ID))
{
using (SPWeb objWeb = objSite.OpenWeb(web.ID))
{

SPList lstMain = objWeb.Lists[Constants.LIST_MEMBERS_AND_STAKEHOLDERS];
if (lstMain != null)
{
DataTable dtMembersStakeHolders = lstMain.Items.GetDataTable();
DataView dvVertical = dtMembersStakeHolders.DefaultView;
dtBoth = dtMembersStakeHolders;

dvVertical.RowFilter = Constants.COLUMN_ISVERTICALRESOURCE + ” = ‘1’” ;
dtVertical = dvVertical.ToTable();

if (isVertical)
{
if (dtVertical.Rows.Count > 0)
{
lstVerticalMembers = GetAllMembers(dtVertical);
dtMain = GenerateDataTable(lstVerticalMembers);
}
}
else
{
if (dtBoth.Rows.Count > 0)
{
lstBothMembers = GetAllMembers(dtBoth);
dtMain = GenerateDataTable(lstBothMembers);
}
}

}
else
{
throw new Exception(“MAIN ASSOCIATE PROJECT LIST CANNOT BE FOUND”);
}

}
}
});
return dtMain;
}

private List<Member> GetAllMembers(DataTable dt)
{
List<Member> lstMembers = new List<Member>();
foreach (DataRow dr in dt.Rows)
{
Member objMember = new Member();
bool isBillable = false;
bool PA_Above = false;
bool trainee = false;
string designation = string.Empty;
bool isOffshore = false;

if (!string.IsNullOrEmpty(dr[Constants.COLUMN_IS_BILLABLE].ToString().Trim()))
{
isBillable = Convert.ToBoolean(Convert.ToInt32(dr[Constants.COLUMN_IS_BILLABLE].ToString()));
}
if (!string.IsNullOrEmpty(dr[Constants.COLUMN_DESIGNATION].ToString().Trim()))
{
designation = dr[Constants.COLUMN_DESIGNATION].ToString().Trim();
if (!string.IsNullOrEmpty(designation))
{
if (!designation.ToLower().Contains(“trainee”))
{
PA_Above = true;
}
else
{
trainee = true;
}
}
}
if (!string.IsNullOrEmpty(dr[Constants.COLUMN_ISOFFSHORE].ToString()))
{
isOffshore = Convert.ToBoolean(Convert.ToInt32(dr[Constants.COLUMN_ISOFFSHORE].ToString()));
}
objMember.Billable = isBillable;
objMember.PA_Above = PA_Above;
objMember.ELT = trainee;
objMember.IsOffShore = isOffshore;

lstMembers.Add(objMember);
}
return lstMembers;
}

private DataTable GenerateDataTable(List<Member> lstMember)
{
DataTable dtMain = new DataTable();

DataColumn dtType = new DataColumn();
dtType.DataType = Type.GetType(“System.String”);
dtType.ColumnName = “TYPE”;
dtMain.Columns.Add(dtType);

DataColumn dtOnsite = new DataColumn();
dtOnsite.DataType = Type.GetType(“System.Int32”);
dtOnsite.ColumnName = “ONSITE”;
dtMain.Columns.Add(dtOnsite);

DataColumn dtOffshore = new DataColumn();
dtOffshore.DataType = Type.GetType(“System.Int32”);
dtOffshore.ColumnName = “OFFSHORE”;
dtMain.Columns.Add(dtOffshore);

DataColumn dtTotal = new DataColumn();
dtTotal.DataType = Type.GetType(“System.Int32”);
dtTotal.ColumnName = “TOTAL”;
dtMain.Columns.Add(dtTotal);

DataRow drBillable = dtMain.Rows.Add();
drBillable[“TYPE”] = “Billable”;
drBillable[“ONSITE”] = 0;
drBillable[“OFFSHORE”] = 0;
drBillable[“TOTAL”] = 0;

DataRow drNonBillable = dtMain.Rows.Add();
drNonBillable[“TYPE”] = “NonBillable”;
drNonBillable[“ONSITE”] = 0;
drNonBillable[“OFFSHORE”] = 0;
drNonBillable[“TOTAL”] = 0;

DataRow drPA_Above = dtMain.Rows.Add();
drPA_Above[“TYPE”] = “PA & Above”;
drPA_Above[“ONSITE”] = 0;
drPA_Above[“OFFSHORE”] = 0;
drPA_Above[“TOTAL”] = 0;

DataRow drElt = dtMain.Rows.Add();
drElt[“TYPE”] = “TRAINEE”;
drElt[“ONSITE”] = 0;
drElt[“OFFSHORE”] = 0;
drElt[“TOTAL”] = 0;

foreach (Member objMember in lstMember)
{
if (objMember.Billable)
{
if (objMember.IsOffShore)
{
drBillable[“OFFSHORE”] = (Int32)drBillable[“OFFSHORE”] + 1;
}
else
{
drBillable[“ONSITE”] = (Int32)drBillable[“ONSITE”] + 1;
}
}
else
{
if (objMember.IsOffShore)
{
drNonBillable[“OFFSHORE”] = (Int32)drNonBillable[“OFFSHORE”] + 1;
}
else
{
drNonBillable[“ONSITE”] = (Int32)drNonBillable[“OFFSHORE”] + 1;
}
}
if (objMember.PA_Above)
{
if (objMember.IsOffShore)
{
drPA_Above[“OFFSHORE”] = (Int32)drPA_Above[“OFFSHORE”] + 1;
}
else
{
drPA_Above[“ONSITE”] = (Int32)drPA_Above[“ONSITE”] + 1;
}
}
else if(objMember.ELT)
{
if (objMember.IsOffShore)
{
drElt[“OFFSHORE”] = (Int32)drElt[“OFFSHORE”] + 1;
}
else
{
drElt[“ONSITE”] = (Int32)drElt[“ONSITE”] + 1;
}
}
}
drBillable[“TOTAL”] = (Int32)drBillable[“OFFSHORE”] + (Int32)drBillable[“ONSITE”];
drNonBillable[“TOTAL”] = (Int32)drNonBillable[“OFFSHORE”] + (Int32)drNonBillable[“ONSITE”];
drPA_Above[“TOTAL”] = (Int32)drPA_Above[“OFFSHORE”] + (Int32)drPA_Above[“ONSITE”];
drElt[“TOTAL”] = (Int32)drElt[“OFFSHORE”] + (Int32)drElt[“ONSITE”];

dtMain.AcceptChanges();
return dtMain;
}

private DataTable GenerateMonthData()
{
DataTable dtMonth1 = new DataTable();
DataTable dtMonth2 = new DataTable();

DataColumn dcJan = new DataColumn();
dcJan.ColumnName = “January”;
dcJan.DataType = Type.GetType(“System.Int32”);
dtMonth1.Columns.Add(dcJan);

DataColumn dcFeb = new DataColumn();
dcFeb.ColumnName = “February”;
dcFeb.DataType = Type.GetType(“System.Int32”);
dtMonth1.Columns.Add(dcFeb);

DataColumn dcMarch = new DataColumn();
dcMarch.ColumnName = “March”;
dcMarch.DataType = Type.GetType(“System.Int32”);
dtMonth1.Columns.Add(dcMarch);

DataColumn dcApril = new DataColumn();
dcApril.ColumnName = “April”;
dcApril.DataType = Type.GetType(“System.Int32”);
dtMonth1.Columns.Add(dcApril);

DataColumn dcMay = new DataColumn();
dcMay.ColumnName = “May”;
dcMay.DataType = Type.GetType(“System.Int32”);
dtMonth1.Columns.Add(dcMay);

DataColumn dcJune = new DataColumn();
dcJune.ColumnName = “June”;
dcJune.DataType = Type.GetType(“System.Int32”);
dtMonth1.Columns.Add(dcJune);

DataColumn dcMarch = new DataColumn();
dcMarch.ColumnName = “July”;
dcFeb.DataType = Type.GetType(“System.Int32”);
dtMonth1.Columns.Add(dcFeb);

DataColumn dcMarch = new DataColumn();
dcMarch.ColumnName = “August”;
dcFeb.DataType = Type.GetType(“System.Int32”);
dtMonth1.Columns.Add(dcFeb);

DataColumn dcMarch = new DataColumn();
dcMarch.ColumnName = “September”;
dcFeb.DataType = Type.GetType(“System.Int32”);
dtMonth1.Columns.Add(dcFeb);

DataColumn dcMarch = new DataColumn();
dcMarch.ColumnName = “September”;
dcFeb.DataType = Type.GetType(“System.Int32”);
dtMonth1.Columns.Add(dcFeb);

}

protected void rdVertical_CheckedChanged(object sender, EventArgs e)
{
if (rdVertical.Checked)
{
dvVertical.Visible = true;
rdBoth.Checked = false;
dvBoth.Visible = false;
}
}

protected void rdBoth_CheckedChanged(object sender, EventArgs e)
{
if (rdBoth.Checked)
{
dvBoth.Visible = true;
rdVertical.Checked = false;
dvBoth.Visible = false;
}
}

}
}

Configuring Custom SharePoint 2010 Timer Job to Trigger mail to SharePoint Group/AD Group

The requirement is to trigger a mail on a weekly basis depending upon the value of SharePoint List. Depending upon your requirement you can send this mail to any existing AD Group too. The below working code will guide you through the process.Here I have utilized Singleton Creational Design Pattern to call the functions and variables in my code. I am not going to explain that part over here.

TimerJobConfigurationBelow screenshot will help you to understand the structure of the code.

Here goes the content of SPTimerJobDefinition class file. I have utilized Sharepoint best  practices guidelines and wrote my code as per. Microsoft.SharePoint and Microsoft.SharePoint.Administration are the main namespaces that is being used over here. Here we are inheriting SPJobDefinition class mainly to override the main Execute method to write our own custom logic for triggering the timer job.

++++++++++++++++++++++++++++++++++++++++++++++++++++++++

using Microsoft.SharePoint;
using Microsoft.SharePoint.Administration;
using FSDC.PDP.InnovationPortalWeeklyTimerJob.Common;

namespace FSDC.PDP.InnovationPortalWeeklyTimerJob
{
public class InnovationPortalWeeklyTimerJobDefinition: SPJobDefinition
{

private CommonFunctions objCommonFunctions = null;
public InnovationPortalWeeklyTimerJobDefinition(): base()
{
}

public InnovationPortalWeeklyTimerJobDefinition(string jobName, SPService service, SPServer server, SPJobLockType targetType) : base (jobName, service, server, targetType)
{
}

public InnovationPortalWeeklyTimerJobDefinition(string jobName, SPWebApplication webApplication) : base(jobName, webApplication, null, SPJobLockType.ContentDatabase)
{
this.Title = jobName;
}

public override void Execute(Guid targetInstanceId)
{
SPWebApplication WebApplication = this.Parent as SPWebApplication;
SPContentDatabase contentDB = WebApplication.ContentDatabases[targetInstanceId];

using (SPSite objSite = contentDB.Sites[Constants.SITE_NAME])
{
using (SPWeb objWeb = objSite.RootWeb)
{
SPSecurity.RunWithElevatedPrivileges(delegate()
{
SPList objList = objWeb.Lists[Constants.LIST_GPMI_IDEA];
if(objList != null)
{
SPQuery objPendingDecisionQuery = new SPQuery();
objPendingDecisionQuery.Query = “<Where><And><Eq><FieldRef Name=’Status’ /><Value Type=’Choice’>”+ Constants.STATUS_PENDING_DECISION + “</Value></Eq><Geq><FieldRef Name=’Created’ /><Value Type=’DateTime’>[Today-7Day(s)]</Value></Geq></And></Where>”;
DataTable dtPendingDecision = new DataTable();
dtPendingDecision = objList.GetItems(objPendingDecisionQuery).GetDataTable();

if((dtPendingDecision!= null) && (dtPendingDecision.Rows.Count >0))
{
StringBuilder sbMessageBody = new StringBuilder();
sbMessageBody.Append(“<BR />PLEASE FOLLOW THE BELOW LINK TO VIEW ALL THE RELATED ITEMS.<BR />”);
sbMessageBody.Append(“<a href='” + Constants.PAGE_LINK + “‘>”);
sbMessageBody.Append(“<span class=’link’>”);
sbMessageBody.Append(Constants.MAIL_LINK);
sbMessageBody.Append(“</span>”);
sbMessageBody.Append(“</a>”);
sbMessageBody.Append(“<BR />”);
sbMessageBody.Append(“<p class=’wrnMessage’>”);
sbMessageBody.Append(Constants.WARNING_MESSAGE);
sbMessageBody.Append(“</p>”);

CommonCode.SendEmailSPGroup(Constants.GRP_M6, sbMessageBody.ToString(), Constants.SUBJECT);
CommonCode.SendEmailADGroup(Constants.GRP_M6, sbMessageBody.ToString(), Constants.SUBJECT);
}
}
});
}
}

}

public CommonFunctions CommonCode
{
get
{
if (objCommonFunctions == null)
{
objCommonFunctions = new CommonFunctions();
}
return objCommonFunctions;
}
}

}
}

++++++++++++++++++++++++++++++++++++++++++++++++++++++++

Here is the TimerJobFeatureReceiver class.

using Microsoft.SharePoint;
using Microsoft.SharePoint.Administration;
using FSDC.PDP.InnovationPortalWeeklyTimerJob.Common;

namespace FSDC.PDP.InnovationPortalWeeklyTimerJob
{
public class InnovationPortalWeeklyTimerJobFeatureReceiver: SPFeatureReceiver
{
private CommonFunctions objCommonFunctions = null;
public CommonFunctions CommonCode
{
get
{
if (objCommonFunctions == null)
objCommonFunctions = new CommonFunctions();
return objCommonFunctions;
}
}

public override void FeatureActivated(SPFeatureReceiverProperties properties)
{
base.FeatureActivated(properties);
try
{
SPWebApplication objWebApp = properties.Feature.Parent as SPWebApplication;
foreach (SPJobDefinition jobDefinition in objWebApp.JobDefinitions)
{
if (jobDefinition.Name.Equals(Constants.JOB_NAME))
{
jobDefinition.Delete();
}
}

InnovationPortalWeeklyTimerJobDefinition weeklyTimerJob = new InnovationPortalWeeklyTimerJobDefinition(Constants.JOB_NAME, objWebApp);

SPWeeklySchedule objWeeklySchedule = new SPWeeklySchedule();
objWeeklySchedule.BeginDayOfWeek = DayOfWeek.Thursday;
objWeeklySchedule.EndDayOfWeek = DayOfWeek.Thursday;

objWeeklySchedule.BeginHour = 18;
objWeeklySchedule.EndHour = 19;

weeklyTimerJob.Schedule = objWeeklySchedule;
weeklyTimerJob.Update();
}
catch (Exception ex)
{
CommonCode.LogError(ex.Message, ex.StackTrace);
}
}

public override void FeatureDeactivating(SPFeatureReceiverProperties properties)
{
base.FeatureDeactivating(properties);
}

public override void FeatureInstalled(SPFeatureReceiverProperties properties)
{
base.FeatureInstalled(properties);
}

public override void FeatureUninstalling(SPFeatureReceiverProperties properties)
{
base.FeatureUninstalling(properties);
}

public override void FeatureUpgrading(SPFeatureReceiverProperties properties, string upgradeActionName, System.Collections.Generic.IDictionary<string, string> parameters)
{
base.FeatureUpgrading(properties, upgradeActionName, parameters);
}
}
}

++++++++++++++++++++++++++++++++++++++++++++++++++++++++++++++

Here are the base functions that are being used send mail to certain SharePoint group and AD Group respectively. The LogError method here being used to write Error that may come along in SharePoint Log file.

Here the SPDiagnosticsService.Local.WriteTrace method being used for the same.

using Microsoft.SharePoint;
using Microsoft.SharePoint.Administration;
using FSDC.PDP.InnovationPortalWeeklyTimerJob.Common;
namespace FSDC.PDP.InnovationPortalWeeklyTimerJob.Common
{
public class CommonFunctions
{
public void SendEmailSPGroup(string grpName, string messageBody, string subject)
{

SmtpClient mailClient = new SmtpClient(Constants.SMTP_MAIL_CLIENT);
List<string> groupUserEmail = new List<string>();
SPGroup objGroup = SPContext.Current.Web.Groups[grpName];
if (objGroup != null)
{
foreach (SPUser user in objGroup.Users)
{
string mailId = user.Email.ToString();
if (!string.IsNullOrEmpty(mailId))
{
groupUserEmail.Add(mailId);
}
}
}
if (groupUserEmail.Count > 0)
{
mailClient.UseDefaultCredentials = true;
MailMessage message = new MailMessage();
foreach (string strUserEmail in groupUserEmail)
{
message.To.Add(strUserEmail);
}
message.Subject = subject;
message.From = new System.Net.Mail.MailAddress(“From@online.microsoft.com”);
message.Body = messageBody;
mailClient.Send(message);
}
}

public void SendEmailADGroup(string grpName, string messageBody, string subject)
{
ADSearcher searcher = new ADSearcher(Constants.LDAP_SERVER_NAME);
IEnumerable<AdUser> UsersInGroup = searcher.GetUsersFromAdGroup(grpName);
List<string> lstUserEmails = new List<string>();

SmtpClient mailClient = new SmtpClient(Constants.SMTP_MAIL_CLIENT);
foreach (AdUser objAdUser in UsersInGroup)
{
string email = objAdUser.Email.ToLower().Trim();
if (!string.IsNullOrEmpty(email))
{
lstUserEmails.Add(email);
}
}
if (lstUserEmails.Count > 0)
{
mailClient.UseDefaultCredentials = true;
MailMessage message = new MailMessage();
foreach (string strUserEmail in lstUserEmails)
{
message.To.Add(strUserEmail);
}
message.Subject = subject;
message.From = new System.Net.Mail.MailAddress(“From@online.microsoft.com”);
message.Body = messageBody;
mailClient.Send(message);
}
}

public void LogError(string message, string stackTrace)
{
SPDiagnosticsService.Local.WriteTrace(0,
new SPDiagnosticsCategory(“Innovation Portal Timer Job Error”,
TraceSeverity.Unexpected, EventSeverity.Error),
TraceSeverity.Unexpected, message, stackTrace);
}

}

+++++++++++++++++++++++++++++++++++++++++++++++++++++++++++++